Ever wonder how to keep your furry friend’s teeth shiny and breath fresh without relying solely on store-bought treats? You’re not alone! Many dog owners want safe, natural, and effective ways to support their pup’s dental health. That’s where homemade dog dental treats come in. Not only are they customizable, but they also give you peace of mind knowing exactly what your dog is snacking on. In this guide, I’ll walk you through everything you need to know—from ingredients and materials to tips for success, common mistakes, and fun variations. Let’s dive into the world of DIY dental treats that will make your pup smile brighter!
Why Make Homemade Dog Dental Treats?

Dog dental health is often overlooked until problems arise. Regular brushing is essential, but treats can also play a big role in maintaining oral hygiene. Commercial dental treats can be effective, but many contain artificial preservatives, fillers, or questionable ingredients. Making your own treats at home allows you to control what goes into them, ensuring they’re safe, healthy, and tailored to your dog’s needs.
Benefits of homemade dental treats include:
- Natural ingredients with no artificial chemicals
- Customizable flavors to suit your dog’s preferences
- Cost-effective and eco-friendly
- Fun bonding activity for you and your pup
- Supports dental health by reducing plaque and tartar build-up
What Are Dog Dental Treats?

Definition List:
| Term | Explanation |
|---|---|
| Dog Dental Treats | Specialized treats designed to help clean teeth, reduce plaque, and freshen breath. |
| Plaque | A sticky film of bacteria that forms on teeth, leading to decay and gum disease. |
| Tartar | Hardened plaque that sticks to teeth, often causing periodontal issues. |
| Chewing Action | The process by which treats help mechanically remove debris and stimulate gums. |
Why choose homemade?
Because these treats are crafted with your dog’s health in mind, ensuring they’re free from harmful additives and tailored to their dental needs.
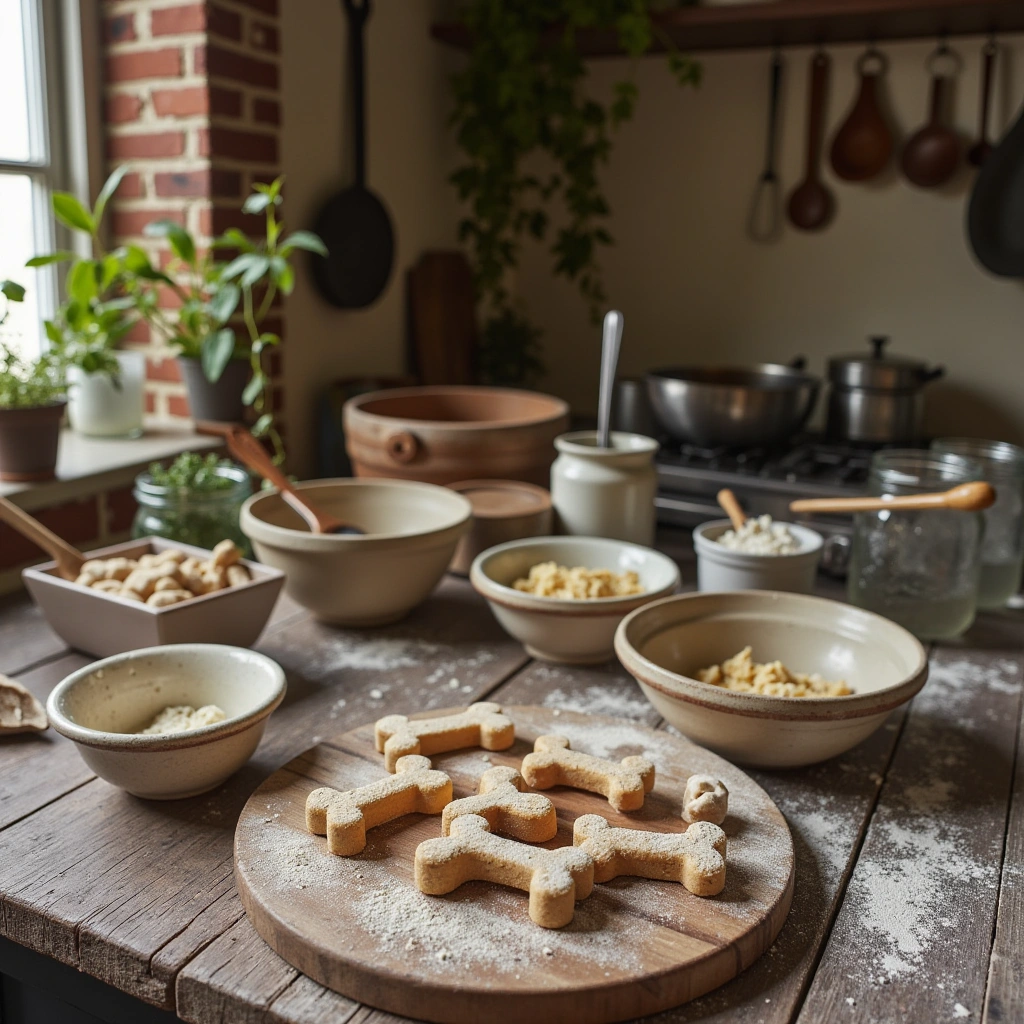
Materials Needed for Homemade Dog Dental Treats

Before jumping into the recipe, gather these essential materials. Having everything ready makes the process smoother!
Ingredients Table
| Ingredient | Quantity | Notes |
|---|---|---|
| Oat Flour | 1 ½ cups | Acts as a healthy base, high in fiber. |
| Carrots (finely grated) | ½ cup | Natural abrasive that helps clean teeth. |
| Parsley (fresh, chopped) | 2 tbsp | Freshens breath naturally. |
| Egg | 1 large | Binds ingredients together. |
| Water or Bone Broth | ¼ cup | Adjust for dough consistency. |
| Coconut Oil (melted) | 1 tbsp | Adds flavor and promotes oral health. |
| Dental-safe herbs (optional) | 1 tsp | Such as peppermint or rosemary, for extra freshness. |
Materials Needed

| Material | Purpose | Notes |
|---|---|---|
| Mixing bowls | Combining ingredients | Preferably non-reactive |
| Measuring cups and spoons | Accurate measurements | Essential for consistency |
| Rolling pin | Flattening dough | For even thickness |
| Baking sheet | Baking treats | Line with parchment paper |
| Parchment paper | Prevents sticking | For easy cleanup |
| Cookie cutters or knife | Shaping treats | Fun shapes are optional |
| Oven | Baking treats | Set to 350°F (177°C) |
| Cooling rack | Cooling treats | Prevents sogginess |
Step-by-Step: How to Make Homemade Dog Dental Treats

Let’s get into the nitty-gritty! Follow these steps carefully for tasty, effective dental treats.
Step 1: Prepare Your Ingredients
- Grate the carrots finely to ensure they’re soft enough for your dog to chew and to maximize their cleaning action.
- Chop fresh parsley finely for even distribution.
Step 2: Mix the Base
- In a large bowl, combine oat flour, grated carrots, parsley, and optional herbs.
- Crack the egg into the mixture.
- Add melted coconut oil.
- Gradually pour in water or bone broth while mixing, until a firm but pliable dough forms. It should be easy to roll but not sticky.
Step 3: Roll Out the Dough
- Lightly flour a clean surface and a rolling pin.
- Roll the dough out to about ¼ inch thickness. Thinner treats are crunchier, which is better for cleaning teeth.
Step 4: Cut into Shapes
- Use cookie cutters or a knife to cut into desired shapes. Bone shapes, circles, or paw prints are popular options.
- Place cutouts on the prepared baking sheet lined with parchment paper.
Step 5: Bake
- Preheat your oven to 350°F (177°C).
- Bake the treats for about 15-20 minutes, or until they turn golden and are firm to the touch.
- Keep an eye on them to prevent burning.
Step 6: Cool and Store
- Remove treats from the oven and transfer to a cooling rack.
- Allow treats to cool completely before giving them to your dog.
- Store in an airtight container for up to two weeks or freeze for longer storage.
Tips for Success

- Adjust ingredients as needed: If the dough feels too dry, add a splash more water; if too sticky, sprinkle a little more oat flour.
- Size matters: Tailor the size of treats to your dog’s size—smaller for small breeds, larger for bigger pups.
- Incorporate dental ingredients: Consider adding small amounts of kelp powder or baking soda for extra oral health benefits.
- Use fresh ingredients: Fresh herbs and vegetables make treats more palatable and healthier.
Common Mistakes and How to Avoid Them

| Mistake | How to Prevent |
|---|---|
| Treats too hard or thick | Roll to an even ¼ inch thickness for consistent crunchiness. |
| Overbaking | Keep an eye on treats in the oven; they can quickly turn from golden to burnt. |
| Using ingredients harmful to dogs | Avoid garlic, onions, xylitol, or artificial preservatives. Stick to dog-safe herbs. |
| Not cooling properly | Ensure treats are fully cooled to prevent sogginess or cracking. |
Variations and Fun Twists

Want to spice things up? Here are some ideas to customize your dog’s dental treats:
- Peanut Butter Version: Replace water with a tablespoon of dog-safe peanut butter (xylitol-free).
- Sweet Potato Treats: Swap carrots for mashed sweet potato for a sweeter flavor.
- Cheesy Treats: Mix in a small amount of shredded cheddar or parmesan.
- Herbal Boost: Add a pinch of dried mint or rosemary for extra breath-freshening effects.
- Training Rewards: Make smaller, bite-sized treats for training sessions.
Summary and Final Thoughts

Homemade dog dental treats are a fantastic way to promote your pup’s oral health while ensuring they’re safe and natural. From choosing the right ingredients to perfecting the baking process, making these treats is both rewarding and straightforward. Remember, consistency is key—combine these treats with regular brushing and dental check-ups for the best results.
Why not give it a try? Your dog will love the tasty, healthy treat, and you’ll enjoy the peace of mind knowing exactly what’s going into their mouth. Happy baking and wagging tails ahead!
Start today to craft the perfect homemade dental treats for your furry friend—because healthy teeth mean a happy pup!